El
BAP Ferré (DM-74) fue una unidad del tipo destructor misilero que
adquirió el Perú para su Marina de Guerra. Fue una unidad de la clase
Daring incorporada a la escuadra peruana en 1973.
Su
construcción para la marina británica, se inició en 1946 y culminó en
1949, en los astilleros Yarrow, Inglaterra, fue asignado en la Real
Marina Británica el 28 de abril de 1953 como HMS Decoy (D106).
El
pabellón peruano fue afirmado a bordo en este buque de guerra en 1973,
incorporándose inmediatamente a la escuadra peruana en el Mar de Grau,
luego de ser modernizado y colocado sus tubos de lanzamiento de misiles.
El BAP Ferré (DM-74) fue dado de baja el 13 de julio de 2007.
Deplazaba 3.820 toneladas y tenía una velocidad de 30 nudos. Su armamento consistía de artillería convencional y de misiles.
Su nombre se debe al teniente primero Diego Ferré, héroe de la Guerra del Pacífico, que combatió a bordo del monitor Huáscar.
Al
iniciarse la Guerra del Pacífico participó en el combate naval de
Iquique el 21 de mayo de 1879, en el Primer (26 de mayo) y Segundo
Combate Naval de Antofagasta (28 de agosto de 1879), y en el combate
naval de Angamos el 8 de octubre de 1879, donde era ayudante del
almirante Miguel Grau Seminario, hallándose a su lado durante la acción
bélica, y en cumplimiento de una orden del almirante, no obstante el
fuego graneado de la escuadra chilena, izó el pabellón peruano de
combate, que había caído momentáneamente por las balas chilenas,
muriendo conjuntamente con el almirante Grau por acción de la misma
granada chilena.
Había sido promovido a la clase de teniente primero AP, el 20 de abril de 1875.
Sus restos descansan en la Cripta de los Héroes del Cementerio Museo de Lima "Presbítero Matías Maestro".
Dada de baja
35 fecundos años al servicio de la Nación
El adios a un grande
Desde
la mañana del martes 25 de noviembre del 2008, el destructor misilero
BAP Ferré, forma parte de la Historia Naval del Perú. Fue durante el
solemne ceremonial realizado a bordo cuando se dio lectura al
dispositivo legal de Baja de Servicio y, tras el consiguiente arriado
del Pabellón Nacional; dejando así, en el trayecto del tiempo, 35 años
fructuosos de actividad, en cuyas travesías, realizó todo tipo de
ejercicios y operaciones de carácter nacional e internacional.
En
el emocionante acto, presidido por el Ministro de Defensa, Doctor
Ántero Flores Aráoz, acompañado por el Comandante General de la Marina,
Almirante Carlos Gamarra Elías y altas autoridades navales, se congregó a
ex comandantes del BAP Ferré, quienes con rostros entristecidos
contemplaban con nostalgia el último arriado del Pabellón de su querida
unidad, que siempre la mantuvieron en el más alto nivel, para cualquier
contingencia, como la que le tocó realizar al surgir los conflictos con
el Ecuador en los años 1981 y 1995. A propósito de este pasaje, el
Comandante de la Fuerza de Superficie, Contralmirante Raúl Vásquez,
luego de resaltar el significado del buque por su valor militar,
extendió su agradecimiento y felicitación a todos los Comandos y
dotaciones que pertenecieron al BAP Ferré, por ese profesionalismo
demostrado a través de 35 años de servicio a la Nación. “Estamos seguros
–dijo– que la tradición forjada sobre sus cubiertas perdurarán como un
gran ejemplo en la memoria de nuestra Institución Naval, de la Fuerza de
Superficie y, de las futuras generaciones”.
El
Alférez de Fragata Diego Ferré, quien nació en el norteño pueblo de
Reque, en la provincia de Chiclayo, fue escogido por el Gran Almirante
Grau como su Ayudante en el Huáscar, por sus excelentes aptitudes y
valor, allí, una granada acabó con su vida; fue el nombre heroico que
llevó esta unidad en sus fecundos años de servicio, por lo cual, el
Ministro de Defensa, durante la tradicional ceremonia, dijo con plena
conciencia del valioso legado de Ferré: “Nos despedimos del BAP Ferré,
pero hacemos votos para que pronto estemos izando el Pabellón Nacional
en otra nave que pueda sustituirlo” .
Servicio del BAP Ferre:
Perú
compró en 1970 dos unidades ex-británicas, el Decoy y el Diana,
rebautizados Ferré y Palacios, pero hasta 1973 no pudo gozar de ambos
buques ya que, tras su adquisición, fueron sometidos a un profundo refit
en Binkerhead.
Entonces los destructores misileros Ferré y Palacios (números de casco 74 y 73 respectivamente) entran en serviciocomo los buques de gran tamaño sólo superados por el crucero Almirante Grau.
La
pareja de buques sufrió notables cambios para adaptarse a los
requerimientos peruanos entre el año de su compra y 1978: fueron
despojados de sonar y del mortero Squid así como de los torpedos, se
armaron con nada menos que 8 misiles MM38 Exocet para especializarlos en
lucha anti-buque (hasta hoy, son los buques que más MM38 han llevado
encima), la artillería AA (anti-aérea) se reemplazó por dos montajes
dobles Breda de 40 mm. similar a los de las Lupo con un control de fuego
RTN-10X, el trinquete se remodeló completamente, y también la chimenea,
y sobre él se instaló un nuevo radar Plessey AWS-1. Ambos recibieron
también una cubierta para helicópteros, y el Palacios un extraño y
diminuto hangar en lugar de la torreta popel. Fue una buena compra para
el Perú quien no dudó en prolongar sus vidas mientrasretiraba del servicio a los numerosos destructores ex-holandeses comprados poco después y que eran una década más jóvenes.
Los
dos Daring eran el intento peruano de responder a la modernización de
los clase Almirante chilenos. Fueron adquiridos como plataformas
anti-buque, y en ese aspecto intimidaban más que los Almirante al contar
con el doble de misiles MM38. También eran más densa su capacidad
artillera (6 cañones frente a 4, aunque durante un buen tiempo montaron
sólo las torres de proa, ya que la de popa fue retirada para instalar un
diminuto hangar, luego desmontado). Sin embargo, los radares de tiro de
los Almirantes eran más eficaces, y los buques chilenos eran más
completos al conservar cierta capacidad antisubmarina con sus torpedos
Mk.44. A los Daring peruanos se les desmontó hasta el radar (cosa
extraña), así como el mortero Limbo que tenían por arma ASW (anti-buque)
pero perfectamente podían haberse completado con algo a este respecto.
Los primeros buques en poseer misiles, tanto anti-aéreo ( los Seacat) como anti-superficie ( los MM-38 Exocet)en
sudamérica fueron los Clase "Almirante" de Chile. Lo que si se puede
destacar de los Daring peruanos es que fueron las únicas unidades de
superficie en el mundo en poseer 8 lanzadores de misiles MM-38 Exocet
por unidad, cosa que no se dio ni siquiera en unidades francesas.
En
1993 el Palacios se retiró del servicio, y casi inmediatamente Chile se
despojaba de sus destructores Riveros y Williams, casi gemelos de los
peruanos en casco y maquinaria. Quedó el Ferré como una extraña y
robusta máquina anacrónica difícil de integrar con las 4 Lupos ya
adquiridasy complicado de
mantener, caro a la hora de dotarlo de tripulación y restringido en su
uso (artillería y misiles anti-buque solamente).
Bap Palacios 73. Observen el diminuto hangar para helicóptero modificado por nuestra Marina
El
Perú no es sólo el poseedor del último crucero artillero del mundo (El
BAP Almirante Grau). También lo es del último destructor: el BAP 74
Ferré.
Es
el último superviviente de los destructores británicos del tipo Daring,
se construyeron 12: 8 para Gran Bretaña y 4 para Australia. Puestos en
quilla inmediatamente después de la II Guerra Mundial, los Daring, en su
configuración original, recordaban mucho (y debían bastante) a los
Allen Sumner y Gearing estadounidenses, con sus tres torres dobles, su
armamento torpedero y la artillería anti-aérea diseminada por todo el
buque.
El
BAP Ferré (DM-74) fue dado de baja el 13 de julio de 2007. Un barco
mítico y un superviviente de un par de eras atrás. Es el penúltimo
destructor artillero en servicio en todo el mundo (México tiene aún un
Gearing dando tumbos), y por eso el Gobierno peruano hubiera hecho bien
en plantearse su conservación. Además de unos cuantos Darings en EEUU,
el Vampire australiano, un Tribal canadiense y un Halland sueco, no hay
más destructores artillados conservados, ninguno de ellos en centro y
sudamérica. Sería un futuro muy digno para el veterano y robusto buque.
Estos
grandes barcos de la era del cañón que luchaban por tener su sitio en
la era del misil debieron ser mantenidos siquiera como museos flotantes.
Recio y de aspecto intimidatorio, el Ferré se merece casi tanto como el
crucero Grau su conservación. Sería el segundo Daring en librarse del
soplete, ya que los australianos exhiben en Sidney al HMAS Vampire, otro
Daring modernizado. El reemplazo del Ferré fueron las dos últimas
fragatas Lupo compradas por nuestro país.
En
la última exhibición al público en la Base Naval se le pudo observar
aún acoderado, pintado con un color gris verdoso distinto a los demás
buques, desarmado, inerte, pero imponente. Los marineros consultados
afirmaban que ya había sido vendido a una empresa privada para su
desguace (sopleteo y venta como chatarra).
Astillero Yarrow and Co. Ltd, Glasgow
Clase Clase Daring
Tipo Destructor
Iniciado 22 de septiembre de 1946
Botado 29 de marzo de 1949
Asignado28 de abril de 1953
abril de 1973
Baja1969
13 de julio de 2007
Destino En espera de destino
Características generales
Desplazamiento 2.819 t estándar
3.592 t apc
Eslora 121.60 m
Manga 13.10 m
Puntal 5.50 m
Calado 4.60 m
Sensores 1 radar Plessey AWS-1 de alerta temprana
1 radar de búsqueda de superficie Thomson-CSF Triton
1 radar para control de tiro RTN-10X
1 radar para navegación Decca 1226
Armamento 8 Exocet MM-38 SSM
3 montajes dobles Vickers 114 mm/45 Mk V
2 cañones compactos OTO Melara Twin 40L70 DARDO
Guerra electrónica F0417-501
Propulsión 2 calderas Babcock & Wilcox
2 turbinas de vapor English Electric
2 hélices
Potencia 54.800 cv
Velocidad 32 nudos (59 km/h)
Autonomía 3.500 mn a 15 nudos
Tripulación 186 (18 oficiales)
Equipamiento aeronaves Pista para el apontaje de un helicóptero medio
La
fuerza de submarinos del Perú es respetada en el mundo entero, por eso
la revista Fuerza Naval tituló: "Submarinos del Perú - Guerreros del
silencio: Entre marzo y Julio del 2006 un submarino del "tercer mundo"
mantuvo en jaque a la poderosa fuerza naval estadounidense. Ni los
sonares mas finos pudieron detectar al escurridizo "lobo de mar" en las
profundidades del Atlantico central. ¿su nombre? el BAP Pisagua de la
Marina de Guerra del Peru." ( aqui el enlace al articulo de la revista: Submarinos del Peru) El Tipo 209 es un clase de
submarinos de ataque diésel/eléctricos desarrollados por el consorcio
Howaldtswerke Deutsche Werft AG en Kiel, Alemania. A pesar de no ser
operado por la Marina de dicho país, ha sido un éxito de exportación.
El
Tipo 209 es un clase de submarinos de ataque diésel/eléctricos
desarrollados por el consorcio Howaldtswerke Deutsche Werft AG en Kiel,
Alemania. A pesar de no ser operado por la Marina de dicho país, ha sido
un éxito de exportación.
Cinco
variantes de esta clase de submarinos han sido producidas: Tipo
209/1100, Tipo 209/1200, Tipo 209/1300, Tipo 209/1400 y Tipo 209/1500.
Los U-209PN ordenados por la Armada de Portugal son, los actualmente
Tipo 214. Los países que operan las distintas clases de los submarinos
Tipo 209 son: Armada Argentina, Brasil, Armada de Chile, Armada de la
República de Colombia, Armada del Ecuador, Grecia, Indonesia, Marina de
Guerra del Perú, Sudáfrica, Corea del Sur, Turquía y Armada de la
República Bolivariana de Venezuela. El primer usuario fue la Armada de
Grecia, que opera cuatro submarinos del Tipo 209/1100 y 4 del Tipo
209/1200. La Armada de Turquía es la mayor usuaria de esta clase de
submarinos ya que cuenta con seis Tipo 209/1200 y ocho Tipo 209/1400.
Los
Tipo 209 generalmente son armados con 14 torpedos y los usados por
Grecia, Corea del Sur y Turquía fueron adaptados para lanzar misiles
antibuque Sub-Harpoon, mientras que los 2 Tipo 209 de la Armada de
Chile, han sido reciente actualizados y han sido dotados con la
capacidad de lanzar misiles SM39 Exocet, para así homologar este tipo de
armamento en su flota de submarinos, junto con los 2 Clase Scorpène que
posee su armada. Muchas marinas han actualizado sus submarinos y es
posible instalar un nuevo sistema de propulsión llamado AIP (por Air
Independent Propulsion o Propulsión independiente del aire).
Los
BAP Islay y Arica, submarinos tipo 209 construidos en los astilleros
Howaldtswerke Deutsche Werft R. G., de Kiel, Alemania arribaron al
Callao en los años 1974 y 1975, constituyendo los primeros buques de su
tipo en arribar a nuestras costas de un total de seis que incrementaron
la Fuerza de Submarinos. Al iniciarse la década del 80 arribaron dos
buques más del tipo 209: BAP Casma y BAP Antofagasta. Finalmente el año
1983 arribaron el BAP Chipana y el BAP Pisagua, completando el número de
unidades previsto por la Institución y que constituyen hoy el pilar de
esta Fuerza próxima a cumplir 100 años.
Las
características de los submarinos tipo 209 son: desplazamiento 1,180
toneladas en superficie y 1,285 en inmersión. La planta propulsora
consta de 4 motores diésel MTU tipo 12V493AZ80 y un motor eléctrico
Siemens acoplados a un eje. Velocidad 11 nudos en superficie y 21 nudos
en inmersión. La autonomía a 4 nudos es 11,300 millas. Ocho tubos
lanzatorpedo de 533 milímetros y capacidad para 14 torpedos filoguiados
SST 4 conforman la capacidad armamentista de estas formidables unidades.
La eslora es 55.90 metros, manga 6.30 metros y calado 5.50 metros. Los
sensores y sistemas de control de tiro son de última generación. La
dotación: 35 hombres.
Prueba
de este prestigio son los operativos anuales internacionales que se
llevan a cabo en la costa atlántica de los Estados Unidos, donde
nuestras unidades participan en ejercicios con los buques
norteamericanos.
La
necesidad de efectuar un especial mantenimiento y cambio de baterías en
los submarinos tipo 209 constituyó un reto para el Servicio Industrial
de la Marina. Desde el año 1968 el astillero realiza trabajos de gran
envergadura en este tipo de naves. Basado en su larga experiencia, el
SIMA ha logrado desarrollar eficientes procedimientos que han sido
utilizados incluso por otras marinas, como fue el caso del recorrido
realizado al submarino colombiano tipo 209 Tayrona entre abril y mayo de
1997.
B.A.P. Chipana concluyó participación en el Ejercicio SUBDIEX-2007
El
profesionalismo y la dedicación de la dotación del B.A.P. Chipana, en
esta oportunidad en la que se debió operar con unidades aéreas, de
superficie y submarinas de la Armada de los EE.UU, confirmó su alto
grado de preparación, al no sólo haber cumplido con las exigencias
operativas de nivel avanzado consideradas en el programa de eventos de
este ejercicio, sino también al sorprender en reiteradas oportunidades a
unidades de primera línea de la Armada de EE.UU. por su característica
silente complementada por las tácticas adoptadas, hecho que mereció el
elogio de las autoridades navales estadounidenses involucradas en las
operaciones.El comando, los oficiales y la tripulación del B.A.P.
Chipana, adquirieron experiencia a lo largo de este período, la misma
que será compartida con aquellos quienes próximamente tendrán la misma
oportunidad, la responsabilidad y el compromiso de dejar en alto, el
prestigio de la Fuerza de Submarinos de la Marina de Guerra del Perú.
• Submarino Tipo: 209
• Construido por: Astillero Howaldtswerke Deutsche Werft, Kiel, Alemania
• Número de Casco : 34
• Eslora: 56.03 metros
• Manga: 6.24 metros
• Puntal : 11.3 metros
• Desplazamiento: 1180 Toneladas (inmersión)
• Velocidades : Superficie 12 nudos, Inmersión 22 nudos
Los buquesLST
(Landing Ship Tank) a las que también se les conoció como Large Slow
Target (Blancos lentos grandes) fueron construidas por los Estados
Unidos ante los planteamientos británicos sobre la necesidad de que se
construyeran una clase de barcos que pudieran transportar carros de
combate directamente desde las fábricas estadounidenses donde se
construían hasta las playas de desembarcosituadas
en Europa. Las LST resultaron ser muy versátiles y muchas se adaptaron o
convirtieron para transportas lanchas de desembarco de tanques LCT
(Landing Craft Tank) y de personal LCP (Landing Craft Personal) ,
también se adaptaron para operar como buques de reparación o de otros
servicios Se construyeron a lo largo de la guerra 1150 en total
CARACTERÍSTICAS:
Desplazamiento: 1625 toneladas estándar; 4080 toneladas a plena carga
Eslora: 100,04 metros
Manga: 15,25 metros
Calado mínimo: 0,712 metros a proa, 2,287 metros a popa
Calado máximo: 2,516 metros a proa, 4,52 metros a popa
Calado normal en desembarcos: 1,194,4 metros a proa, 2,999 metros a popa
Máquinas: Dos motores diesel General Motors de 900 caballos cada uno para mover dos ejes
Velocidad máxima: 12 nudos
Autonomía: 24000 millas náuticas (44472 kilómetros) a 9 nudos
Armamento:
Aunque el armamento de las LST era variable según cada lancha y momento
los estadounidenses determinaron para sus lanchas el siguiente:
2 montajes dobles de 40 mm., 4 montajes simples de 40 mm. y 12 montajes simples de 20 mm.
Tripulación: 9 oficiales y 120 marineros y suboficiales en total 120 tripulantes
Espacio para: 14 oficiales y 131 de clases de tropa (infantería o infantería de marina)
La carga podía ser variada en función de la misión asignada y oscilaba entre las 1600 y 1900 toneladas de carga
La carga típica consistía en:
1
LCT (Landing Craft Tank) Lancha de Desembarco de Tanques además de un
máximo de 20 vehículos (tanques, vehículos oruga, mixtos etc.) podía
transportar artillería, equipos de contrucción, pontones, etc.
El
BAP Chimbote LT-34 fue un LST de 1943 anteriormente llamado en la US
Navy US LST-283. Llevo otros nombres como MS Rawhiti y DT-142. Fue
vendido a la Marina de Guerra del Peru en 1951 por una empresa
británica. Decomisionado en 1984.
El USS Bangust (DE-739) era destructor escolta de la clase Cannon,
similar a la clase Buckley, construido para la Armada de los Estados
Unidos durante la Segunda Guerra Mundial . Sirvió en el Océano Atlántico
y el Océano Pacífico y proporcionó servicio de escolta para los barcos
de la marina contra ataques de submarinos y aereos . Regresó a los
Estados en la final de la guerra con un númerode once estrellas de
batalla .
En un punto a unas 60 millas (97 kilómetros) de su destino, Roi, el
Bangust de radar recogió un contacto en 2325, el 10 de junio de 1944.
Después de no haber recibido ningún informe de submarinos japoneses o
aliados en su camino proyectado, hizo seguimiento de los contactos de
forma continua hasta que los vigías del barco divisaron un navio que
surge en plena tormenta frente a la proa . La mala visibilidad hizo
difícil la identificación, pero, como el rango se redujo a 300 yardas
(270 m),los puestos de observación consideraban que era extranjero, ya
sea como una embarcación de pequeña superficie o un submarino.
Después de que en el radar desapareció, el Bangust avanzó y encendió una
bengala para iluminar la zona, pero no vio nada. Justo después de la
medianoche, el Bangust inspecciono la zona e incluso lanzo algunas
cargas que detonó pero sin respuesta. Después de esto todo se había
calmado, pero una explosión sacudió el barco. Ese choque indicó a los
marineros del destructor de escolta que había sido torpedeado . lucharon
contra las averías, pero sólo se encontró una pequeña fuga en la sala
de máquinas. A popa, verificaron si alguna de sus cargas de profundidad
se habia detonado accidentalmente pero estaban completas.Lanzo cargas de
profundidad escuchando 2 detonaciones y hundieron al submarino japonés
RO-111.
Llegó al Astillero Naval de Filadelfia el 22 de noviembre de 1945 y,
tras la revisión general antes de la inactivación, fue dado de baja el
14 de junio de 1946 en Green Cove Springs, Florida . En reserva para el
estado de eliminación diferida el 21 de marzo de 1947, el Bangust fue
llevado al astillero naval de Charleston , en junio de 1947. Remolcado
allí por Desafío (ATA-201) los días 17 y 18 de junio, la nave
permaneció en el patio hasta el 13 de agosto, cuando, a remolque de
Tunica (ATA-178) fue llevada de vuelta a Mayport, Florida , llegando al
día siguiente. Inactivado el 20 de octubre de 1947, Bangust fue
transferido al gobierno de Perú el 26 de octubre de 1951 bajo los
términos del Programa de Asistencia para la Defensa Mutua (MDAP). Su
nombre borrado del registro de buque de guerra el 18 de abril de 1952.
Ella pasó a llamarse Castilla (D-61) y sirvió como tal hasta que
desguazado en 1979.
Con un desplazamiento de 1700 toneladas, una eslora de 98.9 m, un ancho
de 21.1 m y con una velocidad máxima de 21 nudos, su armamento consistía
de:
- Tres cañones de 3”
- Tres montajes dobles de 40mm
- Diez montajes de 20mm
- Dos mesas lanzacargas de profundidad
stos destructores fueron adquiridos en los Estados Unidos de
Norteamérica, país con el cual se mantenían importantes vínculos a nivel
de Marinas. Los B.A.P. Castilla, B.A.P. Aguirre, B.A.P. Rodríguez
fueron transferidos oficialmente al Perú por el gobierno norteamericano
el 25 de octubre de 1951.
Durante su permanencia en EE.UU., el personal naval en comisión, recibió
importantes instrucciones sobre los sistemas de las diferentes áreas de
abordo. Recibieron capacitación en los sistemas de Armas y Control de
Tiro con el equipamiento más moderno de la época. Finalmente, el jueves
04 de febrero de 1951, el representante del Secretario de Estado hizo
entrega al Embajador del Perú de los tres Destructores. El acto se llevó
a cabo en Green Cove Springs, base de la reserva naval de la U.S.N.
cerca de Jacksonville, en Florida.
El monitor Atahualpa, fue un buque de guerra peruano que participó en la
Guerra del Pacífico. Fue construido en los Estados Unidos por orden de
la marina de guerra americana a mediados del siglo XIX siendo
inicialmente bautizado con el nombre de USS Catawba. El monitor fue
posteriormente vendido a la marina de Guerra del Perú, junto con su
gemelo el monitor Manco Cápac. Fue hundido en 1881 por su propia
tripulación durante el bloqueo del Callao.
Originalmente se llamó USS Catawba. Fue un monitor de Clase Canonicus,
de los que se construyeron 9, los que a su vez fueron una versión
mejorada de la Clase Passaic. Estos monitores fueron diseños para actuar
como defensas costeras o bloqueos de puertos, nunca como buques de
altamar. Sin embargo el Perú lo compró en 1867 para actuar como buque de
batalla en una supuesta operación futura contra la armada española,
país con el que se hallaba en guerra declarada desde 1866.
El USS Catawba nunca fue comisionado. Se empezó su construcción en 1864
por $ 460 mil y se completó en junio de 1865, cuando la Guerra Civil
Estadounidense ya había finalizado y el gobierno de los Estados Unidos
lo cedió a sus constructores para la venta. En 1868, Alex Swift &
Co. lo vendió a Perú, junto con el USS Oneota por $ 2 millones pagaderos
de la siguiente manera: 250 mil al contado y £ 30 mil a días vista
sobre Londres, contados desde la fecha del contrato; $ 346 mil en papel
moneda y $ 800 mil en bonos al 75% con 7% de interés.Esto era, deducido
la pérdida por tipo de cambio, $ 1,8 millones.
Esta venta violaba la neutralidad del gobierno de los Estados Unidos en la guerra entre Perú y España, pero no fue impedida.
En 1877 se le arreglaron las máquinas, pero no se le cambiaron las
calderas debido a la falta de tiempo por sublevación del Huáscar. Luego,
el gobierno no creyó conveniente cambiarle las calderas para evitar una
nueva sublevación de la marina
Cuando se inició la Guerra del Pacífico se intentó llevarla a Arica para
que, como batería flotante defienda el puerto, pero esto no pudo
hacerse por el mal estado de sus calderas. Quedó anclado en el Callao y
defendió al puerto durante el Bloqueo del Callao, cuando al final se le
retiraron sus cañones y se le hundió para evitar que engrose las filas
enemigas.
Astillero Alex Swift & Co, Cincinnati, Ohio Estados Unidos
Clase clase Canonicus
Tipo Monitor
Autorizado 1864
Puesta en grada 21 de mayo de 1864
Asignado 12 de enero de 1869
Baja 16 de enero de 1881
Destino Hundido en el Callao
Características generales
Desplazamiento 1034 Toneladas de registro.
Aproximadamente, 2100 ton
Eslora 68 m
Manga 13,2 m
Calado 4,1 m
Blindaje 5 pulgadas en el casco
11 pulgadas en la torre giratoria
11 pulgadas en la torre de mando
1,5 pulgadas en la cubierta
Armamento 2 cañones de ánima lisa Dahlgren de avancarga de 15 pulgadas
La
fuerza de submarinos del Perú es respetada en el mundo entero, por eso
la revista Fuerza Naval tituló: "Submarinos del Perú - Guerreros del
silencio: Entre marzo y Julio del 2006 un submarino del "tercer mundo"
mantuvo en jaque a la poderosa fuerza naval estadounidense. Ni los
sonares mas finos pudieron detectar al escurridizo "lobo de mar" en las
profundidades del Atlantico central. ¿su nombre? el BAP Pisagua de la
Marina de Guerra del Peru." ( aqui el enlace al articulo de la revista: Submarinos del Peru) El Tipo 209 es un clase de
submarinos de ataque diésel/eléctricos desarrollados por el consorcio
Howaldtswerke Deutsche Werft AG en Kiel, Alemania. A pesar de no ser
operado por la Marina de dicho país, ha sido un éxito de exportación.
Cinco
variantes de esta clase de submarinos han sido producidas: Tipo
209/1100, Tipo 209/1200, Tipo 209/1300, Tipo 209/1400 y Tipo 209/1500.
Los U-209PN ordenados por la Armada de Portugal son, los actualmente
Tipo 214.[1] Los países que operan las distintas clases de los
submarinos Tipo 209 son: Armada Argentina, Brasil, Armada de Chile,
Armada de la República de Colombia, Armada del Ecuador, Grecia,
Indonesia, Marina de Guerra del Perú, Sudáfrica, Corea del Sur, Turquía y
Armada de la República Bolivariana de Venezuela. El primer usuario fue
la Armada de Grecia, que opera cuatro submarinos del Tipo 209/1100 y 4
del Tipo 209/1200. La Armada de Turquía es la mayor usuaria de esta
clase de submarinos ya que cuenta con seis Tipo 209/1200 y ocho Tipo
209/1400.
Los
Tipo 209 generalmente son armados con 14 torpedos y los usados por
Grecia, Corea del Sur y Turquía fueron adaptados para lanzar misiles
antibuque Sub-Harpoon, mientras que los 2 Tipo 209 de la Armada de
Chile, han sido reciente actualizados y han sido dotados con la
capacidad de lanzar misiles SM39 Exocet, para así homologar este tipo de
armamento en su flota de submarinos, junto con los 2 Clase Scorpène que
posee su armada. Muchas marinas han actualizado sus submarinos y es
posible instalar un nuevo sistema de propulsión llamado AIP (por Air
Independent Propulsion o Propulsión independiente del aire).
Los
BAP Islay y Arica, submarinos tipo 209 construidos en los astilleros
Howaldtswerke Deutsche Werft R. G., de Kiel, Alemania arribaron al
Callao en los años 1974 y 1975, constituyendo los primeros buques de su
tipo en arribar a nuestras costas de un total de seis que incrementaron
la Fuerza de Submarinos. Al iniciarse la década del 80 arribaron dos
buques más del tipo 209: BAP Casma y BAP Antofagasta. Finalmente el año
1983 arribaron el BAP Chipana y el BAP Pisagua, completando el número de
unidades previsto por la Institución y que constituyen hoy el pilar de
esta Fuerza próxima a cumplir 100 años.
Las
características de los submarinos tipo 209 son: desplazamiento 1,180
toneladas en superficie y 1,285 en inmersión. La planta propulsora
consta de 4 motores diésel MTU tipo 12V493AZ80 y un motor eléctrico
Siemens acoplados a un eje. Velocidad 11 nudos en superficie y 21 nudos
en inmersión. La autonomía a 4 nudos es 11,300 millas. Ocho tubos
lanzatorpedo de 533 milímetros y capacidad para 14 torpedos filoguiados
SST 4 conforman la capacidad armamentista de estas formidables unidades.
La eslora es 55.90 metros, manga 6.30 metros y calado 5.50 metros. Los
sensores y sistemas de control de tiro son de última generación. La
dotación: 35 hombres.
Prueba
de este prestigio son los operativos anuales internacionales que se
llevan a cabo en la costa atlántica de los Estados Unidos, donde
nuestras unidades participan en ejercicios con los buques
norteamericanos.
La
necesidad de efectuar un especial mantenimiento y cambio de baterías en
los submarinos tipo 209 constituyó un reto para el Servicio Industrial
de la Marina. Desde el año 1968 el astillero realiza trabajos de gran
envergadura en este tipo de naves. Basado en su larga experiencia, el
SIMA ha logrado desarrollar eficientes procedimientos que han sido
utilizados incluso por otras marinas, como fue el caso del recorrido
realizado al submarino colombiano tipo 209 Tayrona entre abril y mayo de
1997.
El
BAP "Antofagasta", es un submarino tipo 209 de fabricación Alemana,
comisionada al Perú el 22 de Mayo de 1981, el cual es una de las seis
poderosas unidades con las que cuenta la Fuerza de Submarinos y la
Marina de Guerra del Perú, la que en la actualidad viene participando en
diversos operativos nacionales e internacionales tales como Iquique,
Unitas, Siforex, entre otros. En los que ha demostrado con eficiencia el
porque son "La Primera Línea de Ataque", es por ello que se dice que:
"En los submarinos hay espacio para todo, excepto para los errores".
• Construido Por: Astillero Howaldtswerke Deutsche Werft Kiel, Alemania
La
fuerza de submarinos del Perú es respetada en el mundo entero, por eso
la revista Fuerza Naval tituló: "Submarinos del Perú - Guerreros del
silencio: Entre marzo y Julio del 2006 un submarino del "tercer mundo"
mantuvo en jaque a la poderosa fuerza naval estadounidense. Ni los
sonares mas finos pudieron detectar al escurridizo "lobo de mar" en las
profundidades del Atlantico central. ¿su nombre? el BAP Pisagua de la
Marina de Guerra del Peru." ( aqui el enlace al articulo de la revista: Submarinos del Peru)
El
Tipo 209 es un clase de submarinos de ataque diésel/eléctricos
desarrollados por el consorcio Howaldtswerke Deutsche Werft AG en Kiel,
Alemania. A pesar de no ser operado por la Marina de dicho país, ha sido
un éxito de exportación.
Cinco
variantes de esta clase de submarinos han sido producidas: Tipo
209/1100, Tipo 209/1200, Tipo 209/1300, Tipo 209/1400 y Tipo 209/1500.
Los U-209PN ordenados por la Armada de Portugal son, los actualmente
Tipo 214.[1] Los países que operan las distintas clases de los
submarinos Tipo 209 son: Armada Argentina, Brasil, Armada de Chile,
Armada de la República de Colombia, Armada del Ecuador, Grecia,
Indonesia, Marina de Guerra del Perú, Sudáfrica, Corea del Sur, Turquía y
Armada de la República Bolivariana de Venezuela. El primer usuario fue
la Armada de Grecia, que opera cuatro submarinos del Tipo 209/1100 y 4
del Tipo 209/1200. La Armada de Turquía es la mayor usuaria de esta
clase de submarinos ya que cuenta con seis Tipo 209/1200 y ocho Tipo
209/1400.
Los
Tipo 209 generalmente son armados con 14 torpedos y los usados por
Grecia, Corea del Sur y Turquía fueron adaptados para lanzar misiles
antibuque Sub-Harpoon, mientras que los 2 Tipo 209 de la Armada de
Chile, han sido reciente actualizados y han sido dotados con la
capacidad de lanzar misiles SM39 Exocet, para así homologar este tipo de
armamento en su flota de submarinos, junto con los 2 Clase Scorpène que
posee su armada. Muchas marinas han actualizado sus submarinos y es
posible instalar un nuevo sistema de propulsión llamado AIP (por Air
Independent Propulsion o Propulsión independiente del aire).
Los
BAP Islay y Arica, submarinos tipo 209 construidos en los astilleros
Howaldtswerke Deutsche Werft R. G., de Kiel, Alemania arribaron al
Callao en los años 1974 y 1975, constituyendo los primeros buques de su
tipo en arribar a nuestras costas de un total de seis que incrementaron
la Fuerza de Submarinos. Al iniciarse la década del 80 arribaron dos
buques más del tipo 209: BAP Casma y BAP Antofagasta. Finalmente el año
1983 arribaron el BAP Chipana y el BAP Pisagua, completando el número de
unidades previsto por la Institución y que constituyen hoy el pilar de
esta Fuerza próxima a cumplir 100 años.
Las
características de los submarinos tipo 209 son: desplazamiento 1,180
toneladas en superficie y 1,285 en inmersión. La planta propulsora
consta de 4 motores diésel MTU tipo 12V493AZ80 y un motor eléctrico
Siemens acoplados a un eje. Velocidad 11 nudos en superficie y 21 nudos
en inmersión. La autonomía a 4 nudos es 11,300 millas. Ocho tubos
lanzatorpedo de 533 milímetros y capacidad para 14 torpedos filoguiados
SST 4 conforman la capacidad armamentista de estas formidables unidades.
La eslora es 55.90 metros, manga 6.30 metros y calado 5.50 metros. Los
sensores y sistemas de control de tiro son de última generación. La
dotación: 35 hombres.
Prueba
de este prestigio son los operativos anuales internacionales que se
llevan a cabo en la costa atlántica de los Estados Unidos, donde
nuestras unidades participan en ejercicios con los buques
norteamericanos.
La
necesidad de efectuar un especial mantenimiento y cambio de baterías en
los submarinos tipo 209 constituyó un reto para el Servicio Industrial
de la Marina. Desde el año 1968 el astillero realiza trabajos de gran
envergadura en este tipo de naves. Basado en su larga experiencia, el
SIMA ha logrado desarrollar eficientes procedimientos que han sido
utilizados incluso por otras marinas, como fue el caso del recorrido
realizado al submarino colombiano tipo 209 Tayrona entre abril y mayo de
1997.
• Submarino Tipo: 209-1200
• Construido por: Astillero Howaldtswerke Deutsche Werft, Kiel, Alemania
• Número de Casco : 31
• Eslora: 56.03 metros
• Manga: 6.24 metros
• Puntal : 11.3 metros
• Desplazamiento: 1180 Toneladas (inmersión)
• Velocidades : Superficie 12 nudos, Inmersión 22 nudos
Desde que estalló la guerra en 1879, el Perú que estaba en inferioridad
naval buscó la manera de nivelar el poderío naval con la adquisición de
torpederas. De esta manera, el 14 de mayo se comisionó al coronel
Enrique Lara para la compra de torpederas.
La Herreshoff & Co. era una empresa que se dedicaba a la
construcción de veleros y yates a vapor, pero en julio de 1878 lanzó un
prototipo de lancha torpedera que era utilizada en demostraciones. En
base a este prototipo se construyeron 5 torpederas de las cuales, 3
fueron compradas por Perú, una por Rusia y otra por los Estados Unidos.
Las construidas para Perú tenían el numeral del astillero 53, 55 y 60.
Debido a la crisis económica del Perú, no se le envió dinero al coronel
Lara y él compró 2 lanchas torpederas a crédito con la colaboración de
W.R. Grace & Co., empresa que se encargaba de abastecer agua a las
guaneras de Tarapacá. Lara viajó a Europa con el propósito de obtener
donaciones de los ricos peruanos residentes en Paris y pagar la
construcción de 6 lanchas torpederas que él ya había contratado, pero
sólo obtuvo £ 3.000 del empresario Carlos Candamo cuando se necesitaba £
24.000. Lara regresó a Estados Unidos y con la colaboración de la W.R.
Grace & Co. logró sacar 2 lanchas ya terminadas que fueron enviadas a
Panamá.
La primera lancha Herreshoff llegó al Callao en el transporte Limeña el 9
de agosto de 1879, desarmada en 5 cajones dirigidos a la Compañía
Cargadora de Guano y remitidas a la Sección de Torpedos y Máquinas de
Guerra en Chucuito, al mando del capitán de navío Manuel Palacios, para
ser armada por los mecánicos contratados por la W.R. Grace & Co.,
comenzando los trabajos el 19 de agosto. La segunda lancha Herreshoff
llegó al Callao en el transporte Oroya el 30 de septiembre de 1879.
El 17 de septiembre se ordenó proseguir con la construcción de las 4
lanchas restantes. La tercera lancha estuvo lista para Perú en diciembre
de 1879, pero no puedo salir porque fue embargada por razones de
neutralidad por el gobierno de Estados Unidos.
Debido a problemas económicos, las lanchas fueron armadas lentamente: el
9 de septiembre fue puesta flote la primera lancha y la segunda, el 5
de noviembre. Recién se probaron el 10 de noviembre de 1879. Las lanchas
fueron bautizadas inicialmente como N°1 y N°2.
El casco era de madera forrada con planchas de acero para proteger a los tripulantes.
La máquina estaba en el centro, hacia proa, y recibía vapor de una caldera cilíndrica con un serpentín en espiral.
Teóricamente debían desarrollar una velocidad máxima de 16 nudos, pero en la práctica no pasaron los 12.
Tenía dos pértigas o botalones basculantes de 11,5 metros de largo en
cuyo extremo estaba un explosivo o torpedo de 100 libras de pólvora.
Operaciones Bélicas
1era comisión
Las lanchas N°1 y N°2 fueron rebautizadas como República y Alianza
respectivamente, al mando la primera del teniente 2° Bernabé Carrasco y
la segunda al mando del capitán de corbeta Manuel Carrasco. Conformaban
una división al mando del coronel Federico Larrañaga, embarcado en la
República. Ambas lanchas zarparon del Callao el 12 de noviembre a las
7:30 am escoltadas por el transporte Talismán, que estaba al mando del
capitán de fragata Leopoldo Sánchez.
A las 8 am y a las 9:15 am del mismo día 12, la República sufrió
desperfectos en su maquinaria, por lo que el Talismán tuvo que
remolcarla mientras la reparaban en la navegación, mantenimiento que
terminó a las 2:45 pm. A las 7 pm la República tuvo otro problema,
siendo nuevamente remolcada por el Talismán hasta las 9 am del 13 de
noviembre, que terminó sus reparaciones arribando por sus propios medios
a Pisco a las 3:30 pm.
El día 13 a la 1 pm, a la Alianza se le desconectó el eje de la hélice
porque el cabo con el que dio remolque a la República se le había
enredado en la hélice y no pudiendo repararla, tuvo que ser remolcada
por el Talismán, arribando a Pisco a las 4 pm.
Como era imposible seguir al sur por el mal estado de las lanchas, el
convoy regresó al Callao el 14 de noviembre, arribando el 15.
Bloqueo de Arica
La lancha Alianza era la que estaba en mejor estado de las dos y se le
envío a Arica abordo de la corbeta Unión, arribando a Arica el 17 de
marzo de 1880 durante la doble ruptura del bloqueo de Arica. La lancha
torpedera estaba al mando del teniente 2° Manuel Fernández Dávila. Desde
entonces sirivó en el patrullaje de la bahía de Arica.
El 7 de abril de 1880, el coronel Francisco Bolognesi, Jefe de la plaza
de Arica, ordenó que la Alianza viajara a la Quebrada de Vítor al sur de
Arica para que reconociera si se estaban desembarcando tropas chilenas.
Zarpó a las 7:35 pm y regresó a las 4 am sin novedades.
Debido a problemas en la calidad del carbón y en las maquinaria, recién
el 3 de mayo de 1880 a las 7:50 pm, zarpa la Alianza con la finalidad de
torpedear al blindado Cochrane, que mantenía junto a otros buques
chilenos, el bloqueo de Arica. A las 10:50 pm tuvo un escape de vapor,
por lo que tuvo que regresar al puerto, reconociendo en el trayecto al
transporte artillado Itata. La avería provenía de su primera comisión
realizada en noviembre de 1879; la lancha fue reparada nuevamente y
quedó lista para el 17 de mayo, pero debido a la claridad de la luna, no
se realizó otra expedición.
El 24 de mayo, por órdenes del contraalmirante Lizardo Montero, zarpó la
lancha Alianza a las 9:45 pm a la caleta de Sama a torpedear a alguno
de los transportes chilenos si estaban ahí. La Alianza arribó a Sama a
las 2:20 am del 25 y como no avistó a ningún buque, regresó. Pero a las 6
am, con la claridad del día y a 15 millas del norte de Arica, la lancha
fue avistada por los buques chilenos bloqueadores, el blindado Cochrane
y la cañonera Magallanes, abriéndole fuego, por lo que la lancha se
preparó a torpedear a la Magallanes, maniobra que fue advertida en el
buque chileno, que se retiró y permitió a la Alianza entrar a Arica a
las 8:25 am.
Cuando llegaron las noches oscuras, volvió a ser comisionado. En la
noche del 1 de junio zarpó para torpedear al blindado Cochrane, pero no
lo encontró. En la noche del 2 zarpó nuevamente, encontrando al Cochrane
a las 11:30 pm, acercándose para aplicar el torpedo, pero cuando se
encontraba cerca, se rompió el botalón por la proa, quedando el torpedo
bajo la quilla.
En la noche del 6 de junio zarpó nuevamente a torpedear al Cochrane,
pero no lo encontró y regresó a las 4:30 am del 7. Al amanecer se dio la
batalla de Arica, se hundió el monitor Manco Cápac y el comandante de
este buque, el capitán de fragata José Sánchez Lagomarsino, ordenó al
teniente 2° Manuel Fernández Dávila que navegara con la lancha Alianza
hasta Mollendo o al Callao. Así lo hizo y fue perseguido por el blindado
Cochrane y el transporte artillado Loa que le sdisparaban, hasta que al
mediodía y a la altura del morro de Sama, el Cochrane regresó a Arica,
continuando la persecución sola el Loa hasta Cabo Picata, en donde la
lancha fue varada por la imposibilidad de continuar porque las máquinas
estaban recalentadas, encargándose el aspirante Juan de Mora de volar la
embarcación con un torpedo.
Torpedera República
La lancha torpedera República tuvo problemas en sus maquinarias que no
pudieron ser solucionados y no fue comisionada nunca más. A fines de
1880 su andar era de 9 nudos y el 26 de diciembre se le dio el mando al
extranjero Esteban Heaton, a quien se le iba a pagar por cada buque que
hundiera, siendo la mayor suma por los blindados Cochrane y Blanco
Encalada, ascendente a £ 80 mil. La República fue llevada por
ferrocariil a Ancón.
La madrugada del 3 de enero de 1881, zarpó la República para torpedear
al blindado Cochrane, pero se frustró el ataque y se perdió un torpedo
Lay. En la mañana del 4 de enero, la lancha que estaba varada en Ancón
fue atacada por dos embarcaciones chilenas: el transporte artillado
Toltén y la lancha torpedera Fresia, produciéndose el combate de Ancón,
entre los buques y las tropas de tierra que defendieron la lancha. La
tripulación de la República, ante la posibilidad de que pudiera ser
tomada por el enemigo, decidió volar la lancha, destruyéndose de esta
forma la última lancha torpedera Herreshoff del Perú.
Astillero Herreshoff Co.
Bristol, Rhode Island, Estados Unidos
Tipo Lancha torpedera
Autorizado 14 de mayo de 1879
Botado 5 de noviembre de 1879
Asignado 12 de noviembre de 1879
Baja 7 de junio de 1880
Destino Destruido por su tripulación
Características generales
Desplazamiento 6 t
7 t a plena carga
Eslora 17,98 m
Manga 2,13 m
Puntal 1,52 m
Armamento 2 torpedos de botalón
Propulsión 1 máquina a vapor alternativa de dos cilindros
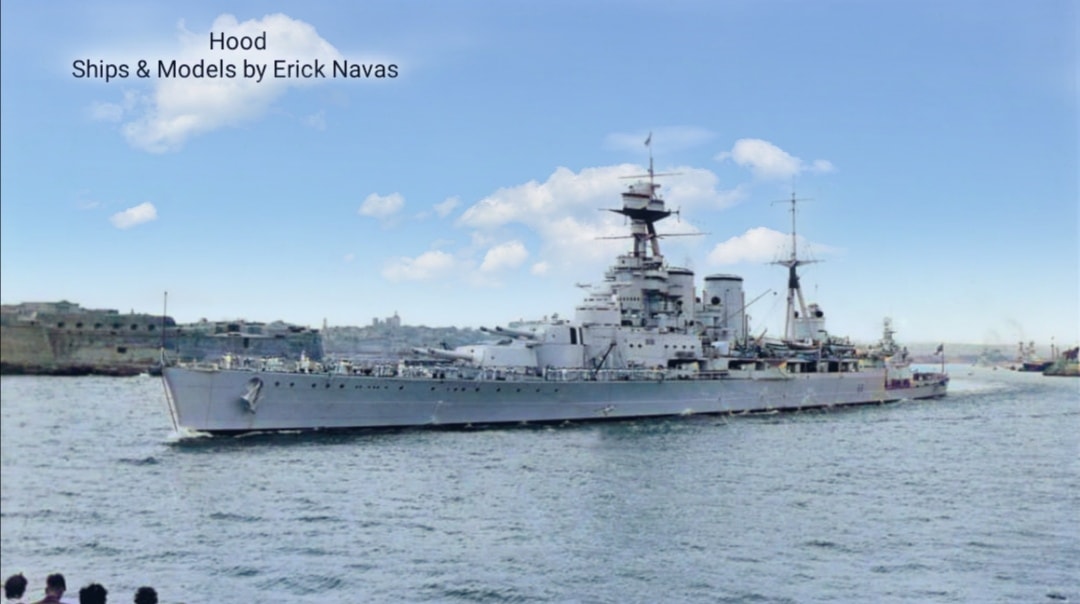
HMS Hood (pennant number 51) was the lead ship of her class of four battlecruisers built for the Royal Navy during World War I. Already under construction when the Battle of Jutland occurred in mid-1916, that battle revealed serious flaws in her design despite drastic revisions before she was completed four years later. For this reason, she was the only ship of her class to be completed, as the Admiralty decided it would be better to start with a clean design on succeeding battlecruisers, leading to the never-built G-3 Class. Despite the appearance of newer and more modern ships, Hood remained the largest warship in the world for 20 years after her commissioning, and her prestige was reflected in her nickname, "The Mighty Hood".
Hood was involved in several showing-the-flag exercises between her commissioning in 1920 and the outbreak of war in 1939, including training exercises in the Mediterranean Sea and a circumnavigation of the globe with the Special Service Squadron in 1923 and 1924. She was attached to the Mediterranean Fleet following the outbreak of the Second Italo-Ethiopian War. When the Spanish Civil War broke out, Hood was officially assigned to the Mediterranean Fleet until she had to return to Britain in 1939 for an overhaul. By this time, advances in naval gunnery had reduced Hood's usefulness. She was scheduled to undergo a major rebuild in 1941 to correct these issues, but the outbreak of World War II in September 1939 forced the ship back into service without the upgrades.
When war with Germany was declared, Hood was operating in the area around Iceland, and she spent the next several months hunting for German commerce raiders and blockade runners between Iceland and the Norwegian Sea. After a brief overhaul of her propulsion system, she sailed as the flagship of Force H, and participated in the destruction of the French fleet at Mers-el-Kebir. Relieved as flagship of Force H, Hood was dispatched to Scapa Flow, and operated in the area as a convoy escort and later as a defence against a potential German invasion fleet.
In May 1941, Hood and the battleship HMS Prince of Wales were ordered to intercept the German battleship Bismarck and the heavy cruiser Prinz Eugen, which were en route to the Atlantic, where they were to attack convoys. On 24 May 1941, early in the Battle of the Denmark Strait, Hood was struck by several German shells, exploded, and sank within 3 minutes, with the loss of all but three of her crew of 1418. Due to her publicly perceived invincibility, the loss affected British morale.
The Royal Navy conducted two inquiries into the reasons for the ship's quick demise. The first, held soon after the ship's loss, concluded that Hood's aft magazine had exploded after one of Bismarck's shells penetrated the ship's armour. A second inquiry was held after complaints that the first board had failed to consider alternative explanations, such as an explosion of the ship's torpedoes. It was more thorough than the first board and concurred with the first board's conclusion. Despite the official explanation, some historians continued to believe that the torpedoes caused the ship's loss, while others proposed an accidental explosion inside one of the ship's gun turrets that reached down into the magazine. Other historians have concentrated on the cause of the magazine explosion. The discovery of the ship's wreck in 2001 confirmed the conclusion of both boards, although the exact reason the magazines detonated is likely to remain unknown since that area of the ship was destroyed in the explosion.
The Admiral-class battlecruisers were designed in response to the German Mackensen-class battlecruisers, which were reported to be more heavily armed and armoured than the latest British battlecruisers of the Renown and the Courageous classes. The design was revised after the Battle of Jutland to incorporate heavier armour and all four ships were laid down. Only Hood was completed, because the ships were very expensive and required labour and material that could be put to better use building merchant ships needed to replace those lost to the German U-boat campaign.
Hood was significantly larger than her predecessors of the Renown class. As completed, she had an overall length of 860 feet 7 inches (262.3 m), a maximum beam of 104 feet 2 inches (31.8 m), and a draught of 32 feet (9.8 m) at deep load. This was 110 feet (33.5 m) longer and 14 feet (4.3 m) wider than the older ships. She displaced 42,670 long tons (43,350 t) at load and 46,680 long tons (47,430 t) at deep load, over 13,000 long tons (13,210 t) more than the older ships. The ship had a complete double bottom. Hood had a metacentric height of 4.2 feet (1.3 m) at deep load, which minimised her roll and made her a steady gun platform.
The additional armour added during construction increased her draught by about 4 feet (1.2 m) at deep load, which reduced her freeboard and made her very wet. At full speed, or in heavy seas, water would flow over the ship's quarterdeck and often entered the messdecks and living quarters through ventilation shafts. This characteristic earned her the nickname of "the largest submarine in the Navy". The persistent dampness, coupled with the ship's poor ventilation, was blamed for the high incidence of tuberculosis aboard. The ship's complement varied widely over her career; in 1919, she was authorised 1433 men as a squadron flagship; in 1934, she had 81 officers and 1244 men aboard.
The propulsion system consisted of 24 Yarrow boilers, connected to Brown-Curtis geared steam turbines driving four propellers. The battlecruiser's turbines were designed to produce 144,000 shaft horsepower (107,000 kW), which would propel the ship at 31 knots (57 km/h; 36 mph), but during sea trials in 1920, Hood's turbines provided 151,280 shp (112,810 kW), which allowed her to reach 32.07 knots (59.39 km/h; 36.91 mph). She carried about 3,895 long tons (3,958 t) of fuel oil, which gave an estimated range of 7,500 nautical miles (13,900 km; 8,600 mi) at 14 knots (26 km/h; 16 mph).
Hood carried eight 42-calibre BL 15-inch (381 mm) Mk I guns in hydraulically powered twin gun turrets. The guns could depress to −5° and elevate to +30°. At maximum elevation, they fired a 1,920-pound (870 kg) shell to a maximum range of 30,180 yards (27,600 m). The turrets were designated 'A', 'B', 'X', and 'Y' from front to rear, and 120 shells were carried for each gun.
Hood's secondary armament consisted of twelve 50-calibre BL 5.5-inch (140 mm) Mk I guns, each with 200 rounds. They were shipped on shielded single-pivot mounts fitted along the upper deck and the forward shelter deck. This high position allowed them to be worked during heavy weather, as they were less affected by waves and spray compared with the casemate mounts of earlier British capital ships. Two of these guns on the shelter deck were temporarily replaced by QF 4-inch (102 mm) Mk V anti-aircraft (AA) guns between 1938 and 1939. All the 5.5-inch guns were removed during another refit in 1940. The gun fired an 82-pound (37 kg) shell to a maximum range of 17,770 yards (16,250 m).
The ship's original anti-aircraft armament consisted of four QF 4-inch Mk V guns on single mounts. These were joined in early 1939 by four twin mounts for the 45-calibre QF 4-inch Mark XVI dual-purpose gun. The single guns were removed in mid-1939 and a further three twin Mark XIX mounts were added in early 1940. This mounting could elevate from −10 to +80°. The Mk XVI gun fired about twelve 35-pound (16 kg) high-explosive shells per minute at a muzzle velocity of 2,660 ft/s (810 m/s). Against surface targets, it had a range of 19,850 yards (18,150 m) and a maximum ceiling of 39,000 ft (12,000 m), but an effective anti-aircraft range of much less.
In 1931, a pair of octuple mountings for the 40-millimetre (1.6 in) QF 2-pounder Mk VIII gun were added on the shelter deck, abreast of the funnels, and a third mount was added in 1937. These gun mounts could depress to −10° and elevate to a maximum of +80°. The Mk VIII 2-pounder gun fired a 40-millimetre (1.6 in) 0.91-pound (0.41 kg) shell at a muzzle velocity of 1,920 ft/s (590 m/s) to a distance of 3,800 yards (3,500 m). The gun's rate of fire was around 96–98 rounds per minute.
Two quadruple mountings for the Vickers 0.5-inch (12.7 mm) Mk III machine gun were added in 1933 with two more mountings added in 1937. These mounts could depress to −10° and elevate to a maximum of +70°. The machine guns fired a 1.326-ounce (37.6 g) bullet at a muzzle velocity of 2,520 ft/s (770 m/s). This gave the gun a maximum range around 5,000 yd (4,600 m), although its effective range was only 800 yd (730 m). To these were added five unrotated projectile launchers in 1940, each launcher carrying 20 7-inch (180 mm) rockets. When they detonated, the rockets shot out lengths of cable that were kept aloft by parachutes; the cable was intended to snag aircraft and draw up the small aerial mine that would destroy the aircraft.
Six fixed 21-inch (533 mm) torpedo tubes were mounted on Hood, three on each broadside. Two of these were submerged forward of 'A' turret's magazine and the other four were above water, abaft the rear funnel.[4] The Mk IV torpedoes had a warhead of 515 pounds (234 kg) of TNT. They had two speed and range settings – 25 knots (46 km/h; 29 mph) with a maximum range of 13,500 yards (12,300 m) or 40 knots (74 km/h; 46 mph) to 5,000 yards (4,600 m). About 28 torpedoes were carried.
Hood was completed with two fire-control directors. One was mounted above the conning tower, protected by an armoured hood, and was fitted with a 30-foot (9.1 m) rangefinder. The other was fitted in the spotting top above the tripod foremast and equipped with a 15-foot (4.6 m) rangefinder. Each turret was also fitted with a 30-foot (9.1 m) rangefinder. The secondary armament was primarily controlled by directors mounted on each side of the bridge. They were supplemented by two additional control positions in the fore-top, which were provided with 9-foot (2.7 m) rangefinders, fitted in 1924–1925. The antiaircraft guns were controlled by a simple high-angle 2-metre (6 ft 7 in) rangefinder mounted on the aft control position,[22] fitted in 1926–1927. Three torpedo-control towers were fitted, each with a 15-foot (4.6 m) rangefinder. One was on each side of the amidships control tower and the third was on the centreline abaft the aft control position.
During the 1929–1931 refit, a high-angle control system (HACS) Mark I director was added on the rear searchlight platform and two positions for 2-pounder "pom-pom" antiaircraft directors were added at the rear of the spotting top, although only one director was initially fitted. The 5.5-inch control positions and their rangefinders on the spotting top were removed during the 1932 refit. In 1934, the "pom-pom" directors were moved to the former locations of the 5.5-inch control positions on the spotting top and the 9-foot (2.7 m) rangefinders for the 5.5-inch control positions were reinstalled on the signal platform. Two years later, the "pom-pom" directors were moved to the rear corners of the bridge to get them out of the funnel gases. Another "pom-pom" director was added on the rear superstructure, abaft the HACS director in 1938. Two HACS Mark III directors were added to the aft end of the signal platform the following year, and the Mark I director aft was replaced by a Mark III. During Hood's last refit in 1941, a Type 279 air-warning radar and a Type 284 gunnery radar were installed, although the Type 279 radar lacked its receiving aerial and was inoperable according to Roberts.
However, Admiralty document ADM 220/76 "Reports of Performance in H.M.S. Hood, H.M.S. Illustrious, H.M.S. King George V and Smaller Vessels of RDF279" indicates that, following the 1941 refit at Rosyth, Hood's Type 279 radar was indeed functional. According to the HMS Hood Association website, the air-warning radar was of a modified type, known as Type 279M, the difference between this and Type 279 being the number of aerials. While Type 279 used two aerials, a transmitter and a receiver, the Type 279M used only a single transceiver aerial. Hood reported an accuracy of 3 degrees with her 279M set.
Hood's armour scheme was originally based on that of the battlecruiser Tiger with an 8-inch (203 mm) waterline belt. Unlike on Tiger, the armour was angled outwards 12° from the waterline to increase its relative thickness in relation to flat-trajectory shells. This change increased the ship's vulnerability to plunging (high-trajectory) shells, as it exposed more of the vulnerable deck armour. 5,000 long tons (5,100 t) of armour were added to the design in late 1916, based on British experiences at the Battle of Jutland, at the cost of deeper draught and slightly decreased speed.
To save construction time, this was accomplished by thickening the existing armour, rather than redesigning the entire ship.[29] Hood's protection accounted for 33% of her displacement, a high proportion by British standards, but less than was usual in contemporary German designs (for example, 36% for the battlecruiser SMS Hindenburg).
The armoured belt consisted of face-hardened Krupp cemented armour (KC), arranged in three strakes. The main waterline belt was 12 inches (305 mm) thick between 'A' and 'Y' barbettes and thinned to 5 to 6 inches (127 to 152 mm) towards the ship's ends, but did not reach either the bow or the stern. The middle armour belt had a maximum thickness of 7 inches (178 mm) over the same length as the thickest part of the waterline armour and thinned to five inches abreast 'A' barbette. The upper belt was 5 inches thick amidships and extended forward to 'A' barbette, with a short 4-inch (102 mm) extension aft.
The gun turrets and barbettes were protected by 11 to 15 inches (279 to 381 mm) of KC armour, except for the turret roofs, which were 5 inches thick. The decks were made of high-tensile steel. The forecastle deck ranged from 1.75 to 2.0 inches (44 to 51 mm) in thickness, while the upper deck was 2 inches (51 mm) thick over the magazines and 0.75 inches (19 mm) elsewhere. The main deck was 3 inches (76 mm) thick over the magazines and 1 inch (25 mm) elsewhere, except for the 2-inch-thick slope that met the bottom of the main belt. The lower deck was 3 inches thick over the propeller shafts, 2 inches thick over the magazines and 1 inch elsewhere.
The 3-inch plating on the main deck was added at a very late stage of construction and the four aftermost 5.5-inch guns and their ammunition hoists were removed in partial compensation. Live-firing trials with the new 15-inch APC (armour-piercing, capped) shell against a mock-up of Hood showed that this shell could penetrate the ship's vitals via the 7-inch middle belt and the 2-inch slope of the main deck. A proposal was made to increase the armour over the forward magazines to 5 inches and 6 inches over the rear magazines in July 1919 in response to these trials. To compensate for the additional weight, the two submerged torpedo tubes and the armour for the rear torpedo warheads were removed, and the armour for the aft torpedo-control tower was reduced in thickness from 6 to 1.5 inches (38 mm). However, the additional armour was never fitted pending further trials. As completed, Hood remained susceptible to plunging shells and bombs. The torpedo warhead armour was reinstated during the ship's 1929–1931 refit.
For protection against torpedoes, she was given a 7.5-foot (2.3 m) deep torpedo bulge that ran the length of the ship between the fore and aft barbettes. It was divided into an empty outer compartment and an inner compartment filled with five rows of water-tight "crushing tubes" intended to absorb and distribute the force of an explosion. The bulge was backed by a 1.5-inch-thick torpedo bulkhead.
Hood was initially fitted with flying-off platforms mounted on top of 'B' and 'X' turrets, from which Fairey Flycatchers could launch. During her 1929–31 refit, the platform was removed from 'X' turret and a trainable, folding catapult was installed on her quarterdeck, along with a crane to recover a seaplane. She embarked a Fairey IIIF from No. 444 Flight of the Royal Air Force. During the 1932 West Indies cruise, the catapult proved to be difficult to operate in anything but a calm sea, as it was frequently awash in bad weather. The catapult and crane were removed in 1932, along with the flying-off platform on 'B' turret.
Although the Royal Navy always designated Hood as a battlecruiser, some modern writers such as Anthony Preston have classified her as a fast battleship, since Hood appeared to have improvements over the fast Queen Elizabeth-class battleships. On paper, Hood retained the same armament and level of protection, while being significantly faster.
Around 1918, American commanders, including Vice Admiral William Sims, commander of US naval forces in Europe, and Admiral Henry T. Mayo, commander of the Atlantic Fleet, became extremely impressed by Hood, which they described as a "fast battleship", and they advocated that the US Navy develop a fast battleship of its own. However, the US continued with their established design direction, the slower, but well-protected South Dakota-class battleship and the fast and lightly armoured Lexington-class battlecruiser, both of which were later cancelled in accordance with the terms of the Washington Naval Treaty of 1922.
Influences from Hood showed on subsequent Lexington designs, with the reduction of the main armour belt, the change to "sloped armour", and the addition of four above-water torpedo tubes to the four underwater tubes of the original design. To add to the confusion, Royal Navy documents of the period often describe any battleship with a maximum speed over 24 knots (44 km/h; 28 mph) as a battlecruiser, regardless of the amount of protective armour. For instance, the never-built G3 battlecruiser was classified as such, although it would have been more of a fast battleship than Hood.
The scale of Hood's protection, though adequate for the Jutland era, was at best marginal against the new generation of 16-inch (406 mm) gunned capital ships that emerged soon after her completion in 1920, typified by the American Colorado-class and the Japanese Nagato-class battleships. The Royal Navy were fully aware that the ship's protection flaws still remained, even in her revised design, so Hood was intended for the duties of a battlecruiser and she served in the battlecruiser squadrons through most of her career. Late in her career, Hood was outclassed by the armour and protective arrangement of World War II-era fast battleships, but few available "big gun" vessels could match Bismarck's speed, and in 1941, the Admiralty included Hood among the ships sent to engage the German battleship Bismarck.
Construction of Hood began at the John Brown & Company shipyards in Clydebank, Scotland, on 1 September 1916. Following the loss of three British battlecruisers at the Battle of Jutland, 5,000 tons of extra armour and bracing were added to Hood's design. Most seriously, the deck protection was flawed—spread over three decks, it was designed to detonate an incoming shell on impact with the top deck, with much of the energy being absorbed as the exploding shell had to penetrate the armour of the next two decks. The development of effective time-delay shells at the end of World War I made this scheme much less effective, as the intact shell would penetrate layers of weak armour and explode deep inside the ship. In addition, she was grossly overweight compared to her original design, making her a wet ship with a highly stressed structure.
She was launched on 22 August 1918 by the widow of Rear Admiral Sir Horace Hood, a great-great-grandson of Admiral Samuel Hood, after whom the ship was named. Sir Horace Hood had been killed while commanding the 3rd Battlecruiser Squadron and flying his flag on Invincible—one of the three battlecruisers which blew up at the Battle of Jutland. To make room in John Brown's shipyard for merchant construction, Hood sailed for Rosyth to complete her fitting-out on 9 January 1920. After sea trials, she was commissioned on 15 May 1920, under Captain Wilfred Tompkinson. She had cost £6,025,000 to build.
With her conspicuous twin funnels and lean profile, Hood was widely regarded one of the finest-looking warships ever built. She was also the largest warship afloat when she was commissioned, and retained that distinction for the next 20 years. Her size and powerful armament earned her the nickname of "Mighty Hood" and she came to symbolise the might of the British Empire itself.
Shortly after commissioning on 15 May 1920, Hood became the flagship of the Battlecruiser Squadron of the Atlantic Fleet, under the command of Rear Admiral Sir Roger Keyes. After a cruise to Scandinavian waters that year, Captain Geoffrey Mackworth assumed command. Hood visited the Mediterranean in 1921 and 1922 to show the flag and to train with the Mediterranean fleet, before sailing on a cruise to Brazil and the West Indies in company with the battlecruiser squadron.
Captain John im Thurn was in command when Hood, accompanied by the battlecruiser Repulse and Danae-class cruisers of the 1st Light Cruiser Squadron, set out on a world cruise from west to east via the Panama Canal in November 1923. The objective of the cruise was to remind the dominions of their dependence on British sea power and encourage them to support it with money, ships, and facilities. They returned home 10 months later in September 1924, having visited South Africa, India, Australia, New Zealand, Canada, and some smaller colonies and dependencies, and the United States.
While in Australia in April 1924, the squadron escorted the battlecruiser HMAS Australia out to sea, where she was scuttled in compliance with the Washington Naval Treaty. The battlecruiser squadron visited Lisbon in January 1925 to participate in the Vasco da Gama celebrations before continuing on to the Mediterranean for exercises. Hood continued this pattern of a winter training visit to the Mediterranean for the rest of the decade. Captain Harold Reinold relieved Captain im Thurn on 30 April 1925 and was relieved in turn by Captain Wilfred French on 21 May 1927.
Hood was given a major refit from 1 May 1929 to 10 March 1931, and afterwards resumed her role as flagship of the battlecruiser squadron under the command of Captain Julian Patterson. Later that year, her crew participated in the Invergordon Mutiny over pay cuts for the sailors. It ended peacefully and Hood returned to her home port afterwards. The battlecruiser squadron made a Caribbean cruise in early 1932, and Hood was given another brief refit between 31 March and 10 May at Portsmouth. Captain Thomas Binney assumed command on 15 August 1932 and the ship resumed her previous practice of a winter cruise in the Mediterranean the next year. Captain Thomas Tower replaced Captain Binney on 30 August 1933. Her secondary and antiaircraft fire-control directors were rearranged during another quick refit between 1 August and 5 September 1934.
While en route to Gibraltar for a Mediterranean cruise, Hood was rammed in the port side quarterdeck by the battlecruiser HMS Renown on 23 January 1935. The damage to Hood was limited to her left outer propeller and an 18-inch (460 mm) dent, although some hull plates were knocked loose from the impact. Temporary repairs were made at Gibraltar before the ship sailed to Portsmouth for permanent repairs between February and May 1935. The captains of both ships were court-martialled, as was the squadron commander, Rear Admiral Sidney Bailey. Tower and Bailey were acquitted, but Renown's Captain Sawbridge was relieved of command. The Admiralty dissented from the verdict, reinstated Sawbridge, and criticised Bailey for ambiguous signals during the manoeuvre.
The ship participated in King George V's Silver Jubilee Fleet Review at Spithead the following August. She was attached to the Mediterranean fleet shortly afterwards and stationed at Gibraltar at the outbreak of the Second Italo-Abyssinian War in October. Captain Arthur Pridham assumed command on 1 February 1936 and Hood returned to Portsmouth for a brief refit between 26 June and 10 October 1936. She formally transferred to the Mediterranean fleet on 20 October, shortly after the beginning of the Spanish Civil War. On 23 April 1937, the ship escorted three British merchantmen into Bilbao harbour despite the presence of the Nationalist cruiser Almirante Cervera that attempted to blockade the port. Hood was refitted at Malta in November and December 1937, and had her submerged torpedo tubes removed. Captain Pridham was relieved by Captain Harold Walker on 20 May 1938 and he, in turn, was relieved when the ship returned to Portsmouth in January 1939 for an overhaul that lasted until 12 August.
Hood was due to be modernised in 1941 to bring her up to a standard similar to that of other modernised World War I-era capital ships. She would have received new, lighter turbines and boilers, a secondary armament of eight twin 5.25-inch gun turrets, and six octuple 2-pounder pom-poms. Her 5-inch upper-armour strake would have been removed and her deck armour reinforced. A catapult would have been fitted across the deck and the remaining torpedo tubes removed. In addition, the conning tower would have been removed and her bridge rebuilt. The ship's near-constant active service, resulting from her status as the Royal Navy's most battle-worthy fast capital ship, meant that her material condition gradually deteriorated, and by the mid-1930s, she was in need of a lengthy overhaul.
The outbreak of World War II made removing her from service near impossible, and as a consequence, she never received the scheduled modernisation afforded to other capital ships such as the battlecruiser Renown and several of the Queen Elizabeth-class battleships. The ship's condensers were in such bad condition by this time that much of the output from the fresh-water evaporators was required to replenish the boiler feed water and could not be used by the crew to wash and bathe or even to heat the mess decks during cold weather, as the steam pipes were too leaky. These problems also reduced her steam output so that she was unable to attain her designed speed.
Captain Irvine Glennie assumed command in May 1939 and Hood was assigned to the Home Fleet's Battlecruiser Squadron while still refitting. When war broke out later that year, she was employed principally to patrol in the vicinity of Iceland and the Faroe Islands to protect convoys and intercept German merchant raiders and blockade runners attempting to break out into the Atlantic. On 25 September 1939, the Home Fleet sortied into the central North Sea to cover the return of the damaged submarine Spearfish. The fleet was spotted by the Germans and attacked by aircraft from the KG 26 and KG 30 bomber wings. Hood was hit by a 250 kg (550 lb) bomb from a Junkers Ju 88 bomber that damaged her port torpedo bulge and her condensers. By early 1940, Hood's machinery was in dire shape and limited her best speed to 26.5 knots (49.1 km/h; 30.5 mph); she was refitted between 4 April and 12 June.
Hood and the aircraft carrier HMS Ark Royal were ordered to Gibraltar to join Force H on 18 June where Hood became the flagship. Force H took part in the destruction of the French fleet at Mers-el-Kébir in July 1940. Just eight days after the French surrender, the British Admiralty issued an ultimatum that the French fleet at Oran intern its ships in a British or neutral port to ensure they would not fall into Axis hands. The terms were rejected and the Royal Navy opened fire on the French ships berthed there. The results of Hood's fire are not known exactly, but she damaged the French battleship Dunkerque, which was hit by four fifteen-inch shells and was forced to beach herself. Hood was straddled during the engagement by Dunkerque; shell splinters wounded two men. Dunkerque's sister ship, Strasbourg, managed to escape from the harbour. Hood and several light cruisers gave chase, but gave up after two hours: Hood had dodged a salvo of torpedoes from a French sloop and had stripped a turbine reaching 28 knots (52 km/h; 32 mph).
Hood was relieved as flagship of Force H by Renown on 10 August, after returning to Scapa Flow. On 13 September, after a quick refit at the dry dock where she was built (rebuilding the blades on her turbines), she was sent to Rosyth along with the battleships HMS Nelson and HMS Rodney and other ships, to be in a better position to intercept a German invasion fleet. When the threat of an invasion diminished, the ship resumed her previous roles in convoy escort and patrolling against German commerce raiders. Twice, Hood was dispatched against enemy warships. On 28 October she sailed to intercept the "pocket battleship" Admiral Scheer, and again on 24 December to locate the heavy cruiser Admiral Hipper, but Hood failed to find either ship.
In January 1941, the ship began a refit that lasted until March; even after the refit she was still in poor condition, but the threat from the German capital ships was such that she could not be taken into dock for a major overhaul until more of the King George V-class battleships came into service. Captain Ralph Kerr assumed command during the refit, and Hood was ordered to sea in an attempt to intercept the German battleships Gneisenau and Scharnhorst upon the refit's completion in mid-March. Unsuccessful, she was ordered to patrol the Bay of Biscay against any breakout attempt by the German ships from Brest. Hood was ordered to the Norwegian Sea on 19 April when the Admiralty received a false report that the German battleship Bismarck had sailed from Germany. Afterwards, she patrolled the North Atlantic before putting into Scapa Flow on 6 May.
When Bismarck sailed for the Atlantic in May 1941, Hood, together with the newly commissioned battleship HMS Prince of Wales, was sent out in pursuit along with several other groups of British capital ships to intercept the German ships before they could break into the Atlantic and attack Allied convoys. Hood was commanded by Captain Ralph Kerr and was flying the flag of Vice-Admiral Lancelot Holland. The German ships were spotted by two British heavy cruisers (Norfolk and Suffolk) on 23 May, and Holland's ships intercepted Bismarck and her consort, the heavy cruiser Prinz Eugen, in the Denmark Strait between Greenland and Iceland on 24 May.
The British squadron spotted the Germans at 05:37 (ship's clocks were set four hours ahead of local time – the engagement commenced shortly after dawn), but the Germans were already aware of their presence, Prinz Eugen's hydrophones having previously detected the sounds of high-speed propellers to their southeast. The British opened fire at 05:52 with Hood engaging Prinz Eugen, the lead ship in the German formation, and the Germans returned fire at 05:55, both ships concentrating on Hood. Prinz Eugen was probably the first ship to score when a shell hit Hood's boat deck, between her funnels, and started a large fire among the ready-use ammunition for the anti-aircraft guns and rockets of the UP mounts.
Just before 06:00, while Hood was turning 20° to port to unmask her rear turrets, she was hit again on the boat deck by one or more shells from Bismarck's fifth salvo, fired from a range of approximately 16,650 metres (18,210 yd). A shell from this salvo appears to have hit the spotting top, as the boat deck was showered with body parts and debris. A huge jet of flame burst out of Hood from the vicinity of the mainmast followed by a devastating magazine explosion that destroyed the aft part of the ship. This explosion broke the back of Hood, and the last sight of the ship, which sank in only three minutes, was her bow, nearly vertical in the water. A note on a survivor's sketch in the British RN Historical Branch Archives gives 63°20′N 31°50′W as the position of the sinking. Hood sank stern first with 1418 men aboard. Only three survived: Ordinary Signalman Ted Briggs (1923–2008), Able Seaman Robert Tilburn (1921–1995), and Midshipman William John Dundas (1923–1965). The three were rescued about two hours after the sinking by the destroyer Electra, which spotted substantial debris but no bodies.
Prince of Wales was forced to disengage by a combination of damage from German hits and mechanical failures in her guns and turrets after Hood was sunk. Despite these problems, she had hit Bismarck three times. One of these hits contaminated a good portion of the ship's fuel supply and subsequently caused her to steer for safety in occupied France where she could be repaired. Bismarck was temporarily able to evade detection, but was later spotted and sunk by the British on 27 May.
The official Admiralty communiqué on the loss, broadcast on the day of the sinking, reported that: "during the ... action, HMS Hood ... received an unlucky hit in a magazine and blew up." The first formal board of enquiry into the loss, presided over by Vice-Admiral Sir Geoffrey Blake, reported on 2 June, less than a fortnight after the loss. It endorsed this opinion, stating that:
(c) (The) probable cause of the loss of HMS Hood was direct penetration of the protection by one or more 15-inch shells at a range of 16,500 yards [15,100 m], resulting in the explosion of one or more of the aft magazines.
The conduct of the inquiry became subject to criticism (e.g. from Admiral Tom Phillips), largely because no verbatim record of witnesses' testimony had been kept. Moreover, Sir Stanley V. Goodall, Director of Naval Construction came forward with an alternative theory, that the Hood had been destroyed by the explosion of her own torpedoes. As a result, a second Board was convened under Rear Admiral Sir Harold Walker and reported in September 1941. This investigation was "much more thorough than was the first, taking evidence from a total of 176 eyewitnesses to the disaster", and examined both Goodall's theory and others (see below). The Board came to a conclusion almost identical to that of the first board, expressed as follows:
That the sinking of Hood was due to a hit from Bismarck's 15-inch shell in or adjacent to Hood's 4-inch or 15-inch magazines, causing them all to explode and wreck the after part of the ship. The probability is that the 4-inch magazines exploded first.
Both boards of enquiry exonerated Vice-Admiral Holland from any blame regarding the loss of Hood.
Memorials to those who died are spread widely around the UK, and some of the crew are commemorated in different locations. One casualty, George David Spinner, is remembered on the Portsmouth Naval memorial,[80] the Hood Chapel at the Church of St John the Baptist, in Boldre, Hampshire, and also on the gravestone of his brother, who died while serving in the Royal Air Force in 1942, in the Hamilton Road Cemetery, Deal, Kent.
Modern theories on the sinking
The exact cause of the loss of Hood remains a subject of debate. The principal theories include the following causes:
A direct hit from a shell penetrated to a magazine aft. Such a shell could only have come from Bismarck, since Prinz Eugen was no longer firing at Hood at the time of the explosion. As noted above, this version of events was almost taken for granted at the time of the sinking. Doubt first arose as a result of eyewitness testimony that the explosion that destroyed Hood originated near the mainmast, well forward of the aft magazines (for example, the sketch shown prepared for the second board of enquiry by Captain Leach of Prince of Wales).
At the second board, expert witnesses suggested that what was observed was the venting, through the engine-room ventilators, of a violent—but not instantaneous—explosion or deflagration in the 4-inch shell magazines. The same deflagration would have collapsed the bulkhead separating the 4-inch and 15-inch magazines, resulting very quickly in a catastrophic explosion similar to those previously witnessed at Jutland. This theory was ultimately adopted by the board.
A shell, falling short and travelling underwater, struck below the armoured belt and penetrated to a magazine. During the same action, Prince of Wales received a hit of this type from a 15-inch shell, which travelled underwater for about 80 feet (25 m), struck about 28 feet (8 m) below the waterline, penetrated several light bulkheads and fetched up, without exploding, against the torpedo bulkhead. The second board considered this theory improbable, arguing that the fuze, had it worked at all, would have detonated the shell before it reached the ship. According to Jurens's calculations, one of Bismarck's shells that fell approximately 20 feet (6.1 m) short of Hood could have penetrated the side of the ship beneath the armour belt and would have detonated in the vicinity of the ship's magazines if the fuze worked.
The ship was destroyed by the explosion of her own torpedoes. According to Goodall's theory, the ship's torpedoes could have been detonated either by the fire raging on the boat deck or, more probably, by a direct hit from Bismarck. This would have blown out the side of the ship, destroying the girder strength of the hull; the force of water entering the hole, at a speed of nearly 30 knots (56 km/h), would then shear the stern section from the rest of the hull.
The fire on the boat deck penetrated to a magazine. Evidence given to the second board indicated that the doors for the 4-inch ammunition supply trunks were closed throughout the action. It remains possible that a door or trunk could have been opened up by an enemy shell, admitting flames to the magazine. Alternative routes for admission of flame could have been the ventilation or venting arrangements of the magazines or, as Ted Briggs suggested, through the floor of a 15-inch gunhouse.
The explosion was initiated by 4-inch ammunition stored outside the magazines. Writing in 1979, the naval historian Antony Preston claimed that the aft magazines of Hood were "surrounded by additional 4-inch (102 mm) anti-aircraft shells outside the armoured barbettes. Such unprotected stowage could have been detonated either by the boat-deck fire or by a shell from Bismarck."
The ship was blown up by her own guns. At the second board, eyewitnesses reported unusual types of discharge from the 15-inch guns of Hood, suggesting that a shell could have detonated within the gun, causing an explosion within the gunhouse. It is possible that, under the stress of combat, the safety measures, introduced after the disasters at Jutland to prevent such an explosion reaching the magazines, could have failed.
An extensive review of these theories (excepting that of Preston) is given in Jurens's 1987 article. Its main conclusion is that the loss was almost certainly precipitated by the explosion of a 4-inch magazine, but that there are several ways this could have been initiated, although he rules out the boat deck fire or the detonation of her torpedoes as probable causes. In Jurens's opinion, the popular image of plunging shells penetrating Hood's deck armour is inaccurate, as by his estimation the angle of fall of Bismarck's 15-inch shells at the moment of the loss would not have exceeded about 14°, an angle so unfavourable to penetration of horizontal armour that it is actually off the scale of contemporaneous German penetration charts. Moreover, computer-generated profiles of Hood show that a shell falling at this angle could not have reached an aft magazine without first passing through some part of the belt armour. On the other hand, the 12-inch belt could have been penetrated if Hood had progressed sufficiently far into her final turn.
A more recent development is the discovery of Hood's wreck. Inspection of the wreck has confirmed that the aft magazines did indeed explode. The stern of the Hood was located, with the rudder still in place, and it was found that this was set to port at the time of the explosion. Furthermore, a section of the bow immediately forward of 'A' turret is missing, which has led historian and former Dartmouth lecturer Eric J. Grove and expedition leader David Mearns to believe that "either just before or just after leaving the surface, the bow suffered massive internal damage from an internal explosion", possibly a partial detonation of the forward 15-inch magazines.
It has been suggested that the fatal fire spread from the aft end of the ship through the starboard fuel tanks, since the starboard side of Hood "appears to be missing most, if not all of its torpedo bulge plating".
The evidence of the wreck refutes Goodall's theory of a torpedo explosion, while the eyewitness evidence of venting from the 4-inch magazine prior to the main explosion conflicts with the theory that the Hood was blown up by her own guns. The other theories listed above remain valid possibilities.
In their study of the battleship Bismarck's operational history released in 2019, including its engagement with Hood, Jurens, William Garzke, and Robert O. Dulin Jr. concluded that Hood's destruction was most likely caused by a 380-mm shell from Bismarck that penetrated the deck armor and exploded in the aft 102-mm magazine, igniting its cordite propellant, which in turn ignited the cordite in the adjacent aft 381-mm magazine. Rapid expansion of the resulting combustion gases from the conflagration then caused structural failure, passing out through the sides of the ship as well as forward and upwards via the engine room vents, expelling the aft main battery turrets and causing the stern to be detached from the rest of the hull at the aft armored bulkhead.
In 2001, British broadcaster Channel 4 commissioned shipwreck hunter David Mearns and his company, Blue Water Recoveries, to locate the wreck of Hood, and if possible, produce underwater footage of both the battlecruiser and her attacker, Bismarck. This was to be used for a major event documentary to be aired on the 60th anniversary of the ships' battle. This was the first time anyone had attempted to locate Hood's resting place. Mearns had spent the previous six years privately researching the fate of Hood with the goal of finding the battlecruiser, and had acquired the support of the Royal Navy, the HMS Hood Association and other veterans groups, and the last living survivor, Ted Briggs.
The search team and equipment had to be organised within four months, to take advantage of a narrow window of calm conditions in the North Atlantic. Organisation of the search was complicated by the presence on board of a documentary team and their film equipment, along with a television journalist who made live news reports via satellite during the search. The search team also planned to stream video from the remotely operated underwater vehicle (ROV) directly to Channel 4's website.
After footage of Bismarck was collected, Mearns and the search team began scanning a 600-square-nautical-mile (2,100 km2) search box for Hood; completely covering the area was estimated to take six days. Areas that Mearns felt were more likely to hold the wreck were prioritised, and the side-scan sonar located the battlecruiser in the 39th hour of the search.
Hood's wreck lies on the seabed in pieces among two debris fields at a depth of about 2,800 metres (9,200 feet). The eastern field includes the small piece of the stern that survived the magazine explosion, as well as the surviving section of the bow and some smaller remains such as the propellers. The 4-inch fire-control director lies in the western debris field. The heavily armoured conning tower is located by itself a distance from the main wreck. The amidships section, the biggest part of the wreck to survive the explosions, lies inverted south of the eastern debris field in a large impact crater. The starboard side of the amidships section is missing down to the inner wall of the fuel tanks and the plates of the hull are curling outward; this has been interpreted as indicating the path of the explosion through the starboard fuel tanks.
It is further supposed that the small debris fields are the fragments from the aft hull where the magazines and turrets were located, since that section of the hull was totally destroyed in the explosion. The fact that the bow section separated just forward of 'A' turret is suggestive that a secondary explosion might have occurred in this area. Other researchers have claimed that the final salvo fired by Hood was not a salvo at all, but flame from the forward magazine explosion, which gave the illusion of Hood firing for the last time. This damage, ahead of the armoured bulkhead, could have been implosion damage suffered while Hood sank, as a torpedo room that had been removed during one of her last refits approximates the site of the break.
It was the opinion of Mearns and White who investigated the wreck that this was unlikely as the damage was far too limited in scale, nor could it account for the outwardly splayed plates also observed in that area. Bill Jurens points out that there was no magazine of any kind at the location of the break and that the location of the break just forward of the forward transverse armoured bulkhead suggests that the ship's structure failed there as a result of stresses inflicted when the bow was lifted into the vertical position by the sinking stern section. Furthermore, the current position of the plates at the edge of the break reflects only their last position, not the direction they had first moved.
The forward section lies on its port side, with the amidships section keel up. The stern section rises from the seabed at an angle. This position shows the rudder locked into a 20° port turn, confirming that orders had been given (just prior to the aft magazines detonating) to change the ship's heading and bring the aft turrets 'X' and 'Y' to bear on the German ships.
In 2002, the site was officially designated a war grave by the British government. As such, it remains a protected place under the Protection of Military Remains Act of 1986.
In 2012, the British Government gave permission for Mearns to return to the site of Hood's final resting place to retrieve one of her two ship's bells which were lying in a small open debris field some way from the wreck herself. With the backing of the HMS Hood Association, Mearns planned to return the bell to Portsmouth where it would form part of the first official and permanent memorial to the sacrifice of her last crew at the newly refitted National Museum of the Royal Navy.
The expedition also took the opportunity to re-film the wreck and survey her using techniques unavailable in 2001. As before, with the exception of the attempted retrieval of the ship's bell, a strict look-but-don't-touch policy was adhered to. The original attempt, sponsored by Paul Allen and using his yacht Octopus, was abandoned after ten days in September 2012 due to unfavourable weather conditions. In 2015, the same team attempted a second recovery operation and Hood's bell was finally retrieved on 7 August 2015. After conservation work, it was put on display in the museum in May 2016.
The recovered bell was originally carried on the pre-dreadnought battleship Hood. Before being installed on the battlecruiser, the bell was inscribed around its base with the words: "This bell was preserved from HMS Hood battleship 1891–1914 by the late Rear Admiral, The Honourable Sir Horace Hood KCB, DSO, MVO killed at Jutland on 31st May 1916." There is a second inscription on the side of the bell that reads "In accordance with the wishes of Lady Hood it was presented in memory of her husband to HMS Hood battle cruiser the ship she launched 22nd August 1918." In addition to the two inscriptions, the bell still wears vivid royal blue paint work on its crown as well as its interior.
Some relics from the time of Hood's sinking still exist. A large fragment of the wooden transom from one of Hood's boats was washed up in Norway after her loss and is preserved in the National Maritime Museum in London.[ A metal container holding administrative papers was discovered washed ashore on the Norwegian island of Senja in April 1942, almost a year after the Battle of the Denmark Strait. The container and its contents were subsequently lost, but its lid survived and was eventually presented to the Royal Navy shore establishment HMS Centurion in 1981.
Other surviving relics are items that were removed from the ship prior to her sinking:
5.5-inch guns
Two of Hood's 5.5-inch guns were removed during a refit in 1935, and shipped to Ascension Island, where they were installed as a shore battery in 1941, sited on a hill above the port and main settlement, Georgetown, where they remain. The guns were restored by the Royal Air Force in 1984.
The Ascension Island guns saw action only once, on 9 December 1941, when they fired on the German submarine U-124, as it approached Georgetown on the surface to shell the cable station or sink any ships at anchor. No hits were scored, but the submarine crash-dived.
As a result of a collision off the coast of Spain on 23 January 1935, one of Hood's propellers struck the bow of Renown. While dry-docked for repairs, Renown had fragments of this propeller removed from her bilge section. The pieces of the propeller were kept by dockyard workers: "Hood" v "Renown" Jan. 23rd. 1935 was stamped on one surviving example, and "Hood V Renown off Arosa 23–1–35" on another. Of the known surviving pieces, one is privately held and another was given by the Hood family to the Hood Association in 2006. Recently a third piece has come to light in Glasgow, where Hood was built. It is held by a private collector and stamped HMS HOOD v HMS RENOWN 23 1 35.